Hyundai blower motor issues can often be resolved by checking the fuse, resistor, and motor itself.
Checking the fuse is the first step, as a blown fuse can cause the blower motor to stop working. If the fuse is intact, the next component to inspect is the resistor, which controls the fan speed. If the resistor is faulty, it can cause the blower motor to malfunction.
Lastly, if the fuse and resistor are both in working order, the blower motor itself may be the culprit. Testing the motor for proper function and making any necessary repairs or replacements can often resolve the issue.
Identifying the Problem

To identify the problem with your Hyundai's blower motor, you'll initially need to recognize the common symptoms indicating a malfunction. If you've turned on the AC or heater and noticed that the air isn't blowing out as it should, or there's no air coming out at all, there's a good chance you're dealing with a faulty blower motor. Another telltale sign is when the blower only works at a certain speed or stops working at some settings. This inconsistency can suggest a problem within the motor's internal components or its controlling mechanisms.
You might hear unusual noises coming from the blower when it's running. A functioning blower motor should operate quietly. So, if it's producing squealing, banging, or rattling sounds, it's a clear indication that something's off. These noises could point to debris stuck in the blower, but they can signal a failing motor.
Pay attention to any burning smells emanating from the vents. This could be a sign of an overheating blower motor, which isn't only a malfunction issue but also a potential safety hazard. Such smells typically indicate that the motor's wiring or resistor is burning out, and immediate attention is required to prevent further damage.
Checking the Fuse
Before diving into more complex diagnostics, it's crucial you check the blower motor fuse, a common culprit behind airflow issues.
Initially, you'll need to locate the fuse box. In most Hyundai models, it's found on the left side of the dashboard or under the hood near the battery. Your owner's manual can give you the exact location and can help you identify the specific fuse related to the blower motor.
Once you've found the fuse box, look for the blower motor fuse. It's typically labeled clearly. You're looking for any signs of damage or breakage. If the fuse looks intact, don't assume it's working perfectly. It's best to test it with a multimeter for continuity. If you don't have a multimeter, you can try swapping the fuse with another of the same rating from your fuse box – just make sure it's a non-essential system you're borrowing from temporarily.
If you ascertain the fuse is blown, replace it with a new one of the same amperage. Fuses are inexpensive and readily available at any auto parts store. However, if the new fuse blows soon after replacement, you might be dealing with a more severe issue that requires professional attention.
Inspecting the Resistor
After checking the fuse, it's crucial you inspect the blower motor resistor, another common point of failure in the airflow system. The resistor controls the speed of the blower motor and, if it's faulty, it could result in the motor not working at all or only working at one speed.
Initially, locate the blower motor resistor. Typically, it's found mounted to the HVAC unit, usually under the dashboard on the passenger side. You might need to remove a panel or two to get access. Once you've found it, visually inspect the resistor for any signs of damage or corrosion. Look for burn marks or any obvious signs of wear and tear.
If the resistor appears to be in good condition visually, you'll need to test it for functionality. This involves checking the resistance levels with a multimeter. However, the specifics of doing this can vary from model to model, so it's best to refer to your Hyundai's service manual for the exact procedure and the resistance values you should expect. If the readings you get don't match the specifications, it's a clear indication that the resistor is faulty and needs replacement.
Testing the Blower Motor
Having inspected the resistor, your next step involves directly testing the blower motor to pinpoint the issue. This can seem challenging, but don't worry, it's a straightforward process that you can do with a bit of patience and the right tools.
Here's how you'll get it done:
- Locate the Blower Motor: To begin with, you'll need to find where your Hyundai's blower motor is situated. It's usually located under the dashboard on the passenger side. You might've to remove a panel or two to get to it.
- Disconnect the Motor: Before you start, make sure your car's ignition is off to avoid any electrical issues. Then, disconnect the blower motor by unplugging the power connector. This might require a bit of wiggling, but be gentle to avoid damaging the connector.
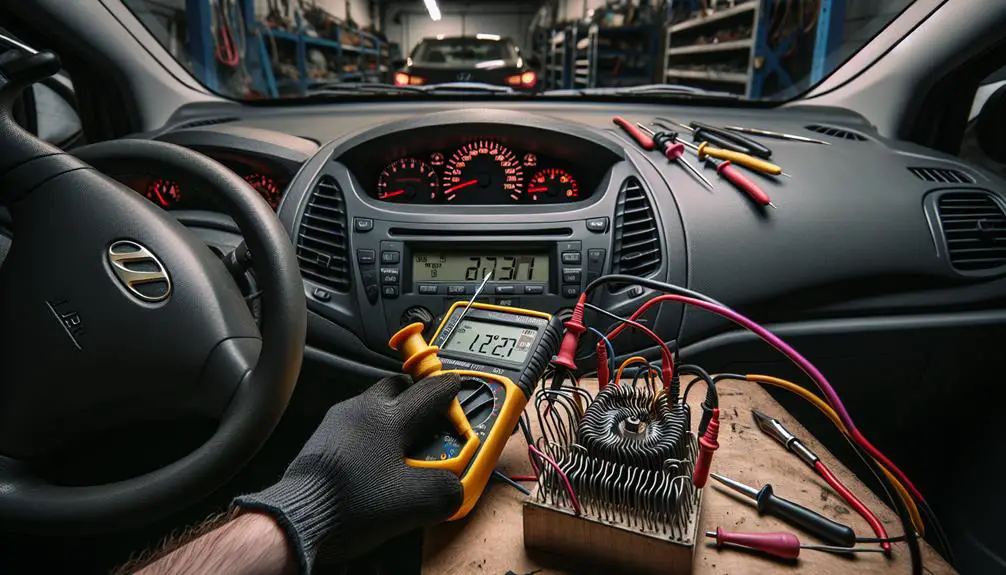
- Test for Power: You'll need a multimeter for this step. Set it to the DC voltage setting that matches your car's battery voltage, usually around 12V. Connect the multimeter's probes to the power connector's terminals (where you just unplugged the blower motor). Turn your car's ignition to the 'on' position and turn on the blower motor from the control panel. If the multimeter shows voltage, power is reaching the motor. No voltage means there's an issue with the power supply.
- Direct Power Test: If you've confirmed power to the connector, the next step is to test the blower motor directly by applying power to it. Use jumper wires to connect the blower motor's terminals directly to the battery. If the motor doesn't run, it's likely faulty.
Professional Diagnosis and Repair

If your Hyundai's blower motor still isn't working after these tests, it's time to seek a professional's help for a thorough diagnosis and repair. This step guarantees that you're not missing a hidden issue that could be causing the malfunction. A certified technician has the tools and expertise to explore deeper into the problem, offering a precise diagnosis that's often out of reach for the average car owner.
When you bring your car in, the mechanic will initially verify the issue by running their own set of tests, similar yet more detailed than what you've done at home. They'll check the electrical connections with specialized equipment, ensuring everything's in order and no wires are frayed or disconnected. If the problem isn't immediately apparent, they might investigate the control module, testing for faults that could disrupt the blower motor's functionality.
Should the issue be with the motor itself, you're looking at a replacement. However, if it's something less direct, like a faulty resistor or a problem in the wiring, repairs might be less invasive and costly. The beauty of professional diagnosis is that it pinpoints the exact problem, saving you time and money on unnecessary repairs.
Conclusion
In wrapping up, you've thoroughly checked your Hyundai's blower motor system, from identifying the issue to inspecting the fuse, resistor, and motor itself.
If you've followed these steps but still can't get the blower to work, it's time to hand it over to the professionals. They've got the expertise and tools to diagnose and fix the problem quickly.
Remember, staying proactive about car maintenance can save you time and hassle down the road.