Replacing a backup camera involves several steps. Assessing your needs is the first step to ensure you choose the right replacement camera for your vehicle. This includes considering factors such as resolution, viewing angle, and compatibility with your existing system.
Once you have selected the right camera, the next step is to remove the old one (if applicable). This may involve accessing the camera housing, disconnecting any wiring or connectors, and unmounting the old camera from its position on your vehicle.
Finally, installing the new camera requires following the manufacturer's instructions and using the appropriate tools. This typically involves mounting the new camera in place, reconnecting any wiring or connectors, and testing the camera to ensure it functions correctly. By following these steps carefully, you can successfully replace your backup camera and improve your vehicle's safety and convenience.
Assessing Your Needs

Before diving into the process of replacing your backup camera, it's critical to evaluate what you specifically need from a new model. This step guarantees you don't end up with a device that falls short of your expectations or exceeds your requirements, wasting valuable resources.
Initially, consider your vehicle's compatibility. You've got to make sure the camera you're eyeing matches your car's make and model. There's no point in getting a top-of-the-line camera if it doesn't fit or work with your vehicle. Next, think about the installation process. Are you looking to do it yourself, or would you prefer professional installation? Your comfort level with technology and vehicle modifications plays a huge role here.
You should reflect on the reasons behind the replacement. If your current camera's image quality is poor, you might want clearer visuals or a wider viewing angle. On the other hand, if functionality is the issue, maybe you're in the market for a camera with advanced features like night vision or motion sensors.
To end, don't overlook your budget. It's easy to get carried away with fancy features you might never use. Stick to what you need and what you're willing to spend. This approach not only narrows down your options but also ensures you invest in a backup camera that serves its purpose without exceeding your budget.
Choosing the Right Camera
After evaluating your needs, it's time to select the right backup camera that aligns with your vehicle, preferences, and budget. With the vast array of options available, it's important to narrow down your choices by considering a few key factors.
First and foremost, think about compatibility. Not all cameras will fit every vehicle, so you'll need to make sure the model you choose can be seamlessly integrated with your car's make and model. Sometimes, it's best to opt for a camera specifically designed for your vehicle for a perfect fit and easier installation.
Next, consider the camera's resolution and field of view. Higher resolution cameras provide clearer images, which can greatly improve your ability to see obstacles behind you. A wider field of view captures more area behind your vehicle but beware of cameras with too wide an angle, as they can distort distances, making objects appear further away than they really are.
Additionally, take into account the camera's low-light performance. If you frequently drive at night or in dimly lit areas, look for a camera with excellent night vision capabilities. This feature can make a huge difference in visibility during nighttime reversing.
Lastly, don't forget about additional features that may interest you, such as parking guidelines, which can assist in accurately gauging distance, or a wireless connection, which simplifies the installation process by eliminating the need to run cables from the camera to the display inside your vehicle.
Removing the Old Camera
Once you've selected the ideal backup camera for your vehicle, the next step involves carefully removing the old camera to make way for the new installation. This process requires patience and a bit of technical know-how, but don't worry, you've got this. Here's a straightforward guide to help you remove the old camera without causing damage to your vehicle.
- Disconnect the Battery: Before you start, make sure your vehicle's engine is off, and then disconnect the battery. This is an important safety step to prevent any electrical shocks or short circuits while you're working.
- Access the Camera: Depending on your vehicle, the backup camera might be mounted on the trunk, license plate frame, or rear bumper. You'll likely need to open the trunk or rear hatch to access the camera's wiring and mount. In some cases, removing interior panels or protective coverings is necessary.
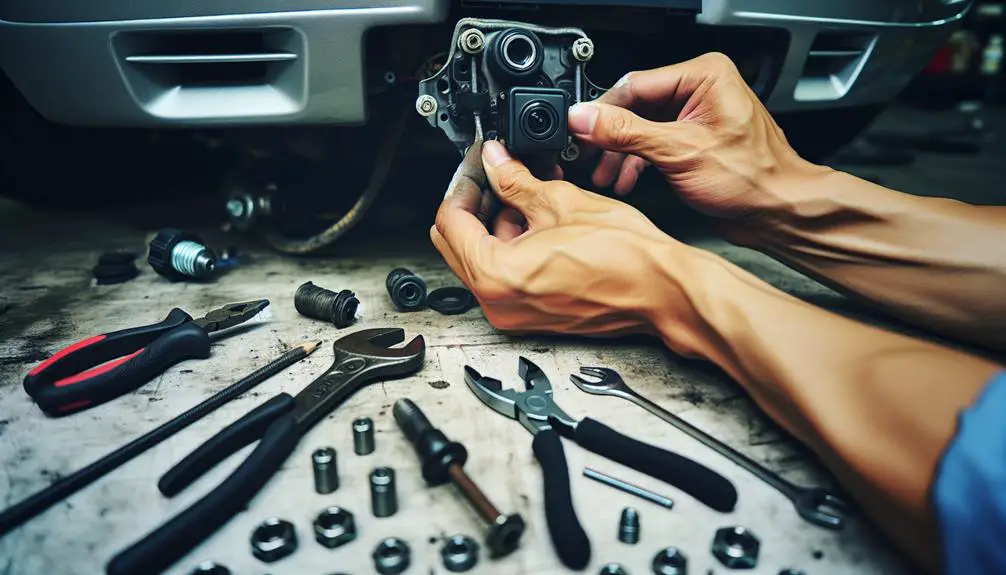
- Disconnect the Wiring: Once you've located the camera, carefully disconnect the wiring harness connected to it. This might require gently pressing a tab to release the connector. Make sure to note how everything is connected; taking a quick photo can help you remember when it's time to install the new camera.
- Remove the Old Camera: With the wiring disconnected, you can now remove the old camera. This may involve unscrewing mounting screws or releasing clips that hold the camera in place. Handle everything gently to avoid damaging the vehicle's exterior or wiring.
Installing the New Camera
Having verified the necessary tools and components laid out, you're now ready to install the new backup camera in your vehicle. Start by making sure you've got all the necessary tools and components laid out. This may include the new camera, screws or mounting hardware, and any wiring or connectors needed for installation.
Commence by positioning the new camera where the old one was located. If it's a universal fit, you might need to adjust the mounting bracket to ensure a snug fit. Once you've got it positioned correctly, secure the camera with the provided screws or mounting hardware. Avoid overtightening to prevent damage to the camera or your vehicle.
Next, you'll need to connect the camera to your vehicle's power and video input. Most backup cameras come with a power cable that needs to be connected to the reverse light power wire. This ensures the camera only turns on when you're backing up. Carefully splice the camera's power cable into the reverse light's power wire, and secure the connection with wire nuts or electrical tape.
Then, route the video cable from the camera to the display monitor inside your vehicle. This might require you to run the cable through the vehicle's body, entering through the trunk or tailgate and moving towards the front. Take care to avoid pinching the cable or running it near moving parts. Once you've routed the cable to the monitor, connect it according to the manufacturer's instructions.
Testing and Troubleshooting
Now that you've installed the new backup camera, it's crucial to test its functionality to make sure it operates correctly. Testing and troubleshooting are essential steps to guarantee your safety and the camera's reliability. Let's delve into how you can effectively test your new backup camera.
- Power Up the System: The initial step is to start your vehicle and activate the backup camera by shifting into reverse. If your camera doesn't power on, double-check your wiring connections and the fuse related to the camera's power supply.
- Check the Display: Once the camera powers on, observe the display screen. You're looking for a clear image without any distortion or interference. If the image isn't clear, you might need to adjust the camera angle or check for obstructions.
- Test the Night Vision: If your backup camera comes with night vision, test it in low-light conditions. The image should still be clear and detailed. If it's not, ensure the camera's infrared lights are functioning and not blocked.
- Assess the Dynamic Guidelines: If your camera has dynamic guidelines, observe their movement as you steer. They should accurately reflect the path your vehicle is taking. If they don't, recalibrate the camera according to the manufacturer's instructions.
If you encounter any issues during these steps, refer to the troubleshooting guide provided with your backup camera. Sometimes, a simple adjustment or reconnection can fix the problem. However, if issues persist, you might need to contact the manufacturer for further assistance or consider a professional inspection.
Conclusion
Now that you've successfully replaced your backup camera, you're all set to hit the road with improved safety and visibility. Remember, choosing the right camera and carefully following the removal and installation steps are critical.
If you run into any hiccups, don't hesitate to troubleshoot or seek professional help. With your new camera installed, you'll enjoy a clearer view and a more confident driving experience.
Safe travels and enjoy the improved perspective your new backup camera provides!