Replacements for the blower motor in a Hyundai Sonata can be completed effectively with the proper guidance and tools.
The process involves accessing the motor, disconnecting the wiring, removing the old motor, installing the new one, reconnecting the wiring, and testing the system before reassembly.
By following these steps carefully and methodically, anyone with basic mechanical knowledge can successfully replace a blower motor in a Hyundai Sonata.
Symptoms of a Faulty Blower Motor

Identifying a faulty blower motor in your Hyundai Sonata is crucial, and several telltale signs can help you spot trouble early on. To start, you might notice that your car's heating and cooling system isn't working as efficiently as it used to. If you're cranking up the A/C or heater and only getting a weak airflow or none at all, there's a good chance your blower motor's on the fritz.
Another dead giveaway is unusual noises coming from the blower motor area. If you hear rattling, banging, or screeching sounds when the fan is on, it's likely due to a failing blower motor. These noises are more than just a nuisance; they're your car telling you something's wrong.
You might experience intermittent operation of the blower motor. One minute, it's working fine, and the next, it's completely dead. This sporadic behavior can be both frustrating and indicative of a blower motor that's on its final legs.
To conclude, a burning smell coming from the vents is a serious symptom that shouldn't be ignored. It could indicate that the blower motor is overheating, potentially because of a short circuit. This isn't just a matter of comfort—it's a safety issue.
If you're noticing any of these issues, it's time to take a closer look at your Hyundai Sonata's blower motor. Early diagnosis can save you from a more complicated and expensive repair down the line.
Necessary Tools and Materials
After pinpointing the symptoms of a faulty blower motor in your Hyundai Sonata, you'll need to gather the right tools and materials for the replacement job. Ensuring you have everything you need before you start can save you time and frustration. Let's delve into what you'll require to make this repair smooth and efficient.
First things first, you're going to need a new blower motor. It's essential to get a compatible replacement for your specific Sonata model year. You can find this either online or at your local auto parts store. With the new blower motor at hand, there are several tools and materials you must have ready:
- Screwdrivers (both Phillips and flat-head)
- Socket set
- Electrical tape
- Multimeter
- Gloves
Using the screwdrivers and socket set, you'll be able to access and remove the blower motor's housing and its securing components. The electrical tape is essential for any minor insulation work you might need to do on the wiring. A multimeter is handy for testing connections to ensure the new blower motor is properly hooked up and operational. Lastly, don't forget the gloves. They'll protect your hands from sharp edges and any debris you encounter.
Gathering these tools and materials beforehand will streamline the replacement process. It ensures you're prepared for any minor hiccups and can complete the job without unnecessary interruptions. Remember, having the right tools is just as essential as having the know-how.
Removing the Old Blower Motor
How do you start the process of removing the old blower motor from your Hyundai Sonata?
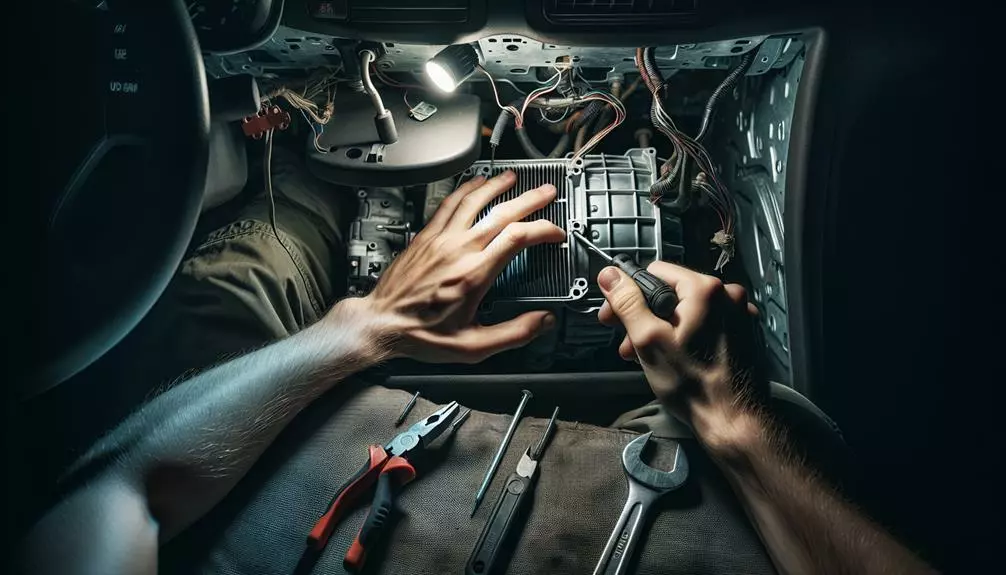
Initially, you'll need to make sure your car's ignition is off and the keys are removed to prevent any electrical issues. Then, locate the blower motor. It's typically found under the dashboard on the passenger side. You might need to remove a few panels or covers to get to it, so keep your screwdriver handy.
Once you've got a clear path to the blower motor, disconnect the electrical connector by gently pressing on the tab and pulling it away. This step is important; you don't want to damage the connector as you'll need it in good shape for the new motor.
Next, you'll find the blower motor secured in place with screws or bolts. Using the appropriate tool, remove these fasteners. Keep them somewhere safe; you'll need them to secure the new motor.
With the fasteners removed, you can now carefully take out the old blower motor. It might require a bit of wiggling to free it from its position, especially if it's been there for a while. Be cautious not to force it too much to avoid damaging surrounding components.
And there you have it! You've successfully removed the old blower motor from your Hyundai Sonata. Make sure to keep the area clean and free of debris before installing the new motor. Remember, a clean workspace is key to a smooth installation process.
Installing the New Blower Motor
With your old blower motor now removed, it's time to install the new one into your Hyundai Sonata. The process is straightforward, but paying attention to detail is essential for a smooth operation. Here's how you can make sure your new blower motor is installed correctly and efficiently.
Initially, before you start, make sure the new blower motor is identical to the one you just removed. This includes checking the mounting points, connector types, and making sure it's the correct model for your Sonata. Once you're sure it's the right fit, you're ready to proceed.
- Align the new blower motor with the mounting area. It should sit flush against the housing without force. If it doesn't fit easily, double-check its orientation and model compatibility.
- Secure the motor in place using the screws or bolts you removed earlier. Don't overtighten them; just make sure they're snug so the motor is held firmly without stressing its housing.
- Reconnect the electrical connector to the blower motor. It should click into place, indicating a secure connection. If it doesn't fit, check for any bent pins or debris that might obstruct the connection.
- Test the blower motor before finalizing the installation. Turn on your car's ignition and adjust the blower settings to verify it operates smoothly across all speeds. This step is important to make sure everything is working before you put everything back together.
- Replace any covers or panels that were removed to access the motor. Make sure these are securely fastened too, to prevent any rattling or loose parts.
After Replacement Care and Tips

After you've successfully installed the new blower motor in your Hyundai Sonata, it's important to consider a few care and maintenance tips to safeguard its longevity and peak performance. First and foremost, don't forget to regularly check the blower motor's connections and wiring. Loose connections can lead to operational issues or even cause the motor to stop working entirely. It's a simple step that can save you a lot of trouble down the line.
You'll also want to keep an eye on the blower motor's filter. A clogged or dirty filter can greatly reduce the efficiency of your blower motor, making it work harder and potentially shortening its lifespan. Make it a habit to inspect the filter every few months and replace it as needed. This not only ensures your blower motor runs smoothly but also improves the air quality inside your car.
Moreover, listen for any unusual sounds coming from the blower motor after replacement. If you hear rattling or buzzing, it might indicate that the motor isn't secured properly or there's debris inside. Addressing these noises promptly can prevent further damage.
Conclusion
You've now tackled the task of replacing your Hyundai Sonata's blower motor. With the right tools and a bit of patience, you've removed the faulty motor and installed a new one, ensuring your car's HVAC system is back in top shape.
Remember to test the new motor to confirm it's working properly and keep an eye out for any unusual noises or issues. By taking care of your Sonata, it'll keep providing you with a comfortable ride.